What is Brave Browser
Brave Browser is a free and open-source web browser developed by Brave Software, Inc. It’s built on the Chromium web browser engine, which also powers Google Chrome. Brave Browser is designed with a focus on privacy, security, and speed, offering users features such as built-in ad-blocking, tracker blocking, and automatic HTTPS upgrading to enhance online privacy and security.
One of the distinctive features is its Brave Rewards program, which allows users to opt into viewing privacy-respecting ads in exchange for Basic Attention Tokens (BAT), a form of cryptocurrency. Users can then choose to support content creators by tipping them with BAT tokens.
Brave Browser has gained popularity among users who prioritize privacy and security online, as well as those interested in exploring alternative revenue models for content creators on the internet. It’s available for various operating systems, including Windows, macOS, Linux, Android, and iOS.

How to set a proxy in Brave Browser
Configuring a proxy in Brave is straightforward, but the way it’s done can be different depending on your device or operating system. This guide walks you through each step, explains why you might want to use a proxy, and also covers how to set it up specifically on Ubuntu.
Whether you’re improving privacy, routing traffic, or accessing geo-restricted content, you’ll find the steps you need right here.
How to Set a Proxy in Brave on Windows or macOS
Because Brave uses your system’s network configuration, you’ll set the proxy in your operating system. Here’s how:
Windows
Launch your Brave Browser on your device.
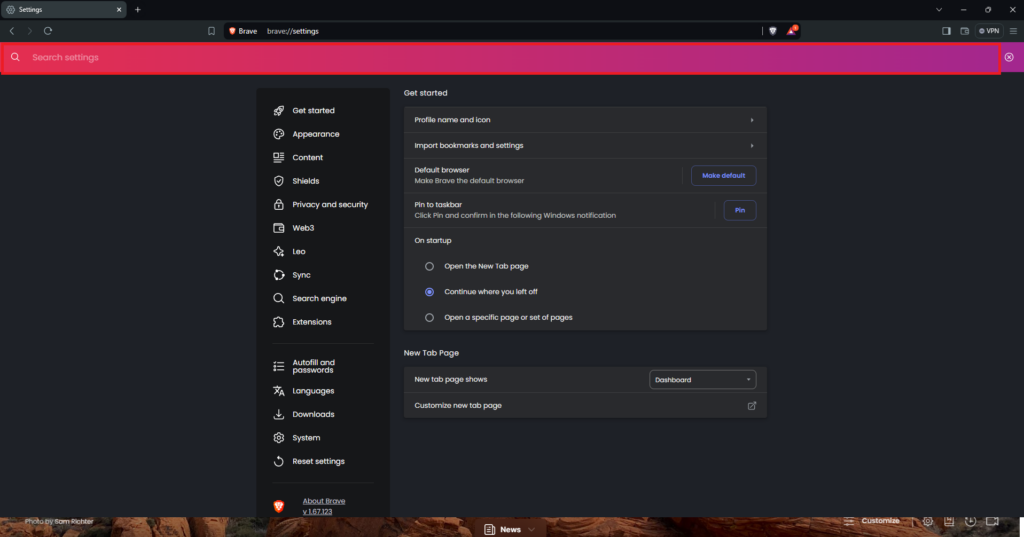
Open Settings: Click on the menu icon (three horizontal lines) located in the top-right corner of the browser window. From the dropdown menu, select “Settings.”

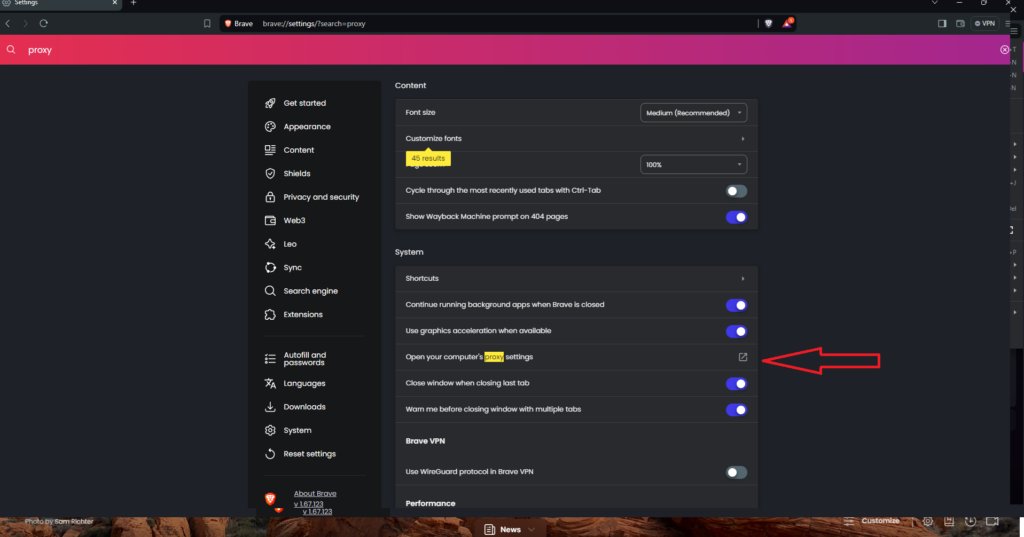
In the search bar type “proxy”
Find and Open Proxy Settings: Scroll down until you find the “System” section. Under this section, there should be an option labeled “Open your computer’s proxy settings.” Click on this option.
Proxy Settings on Your Computer: Clicking on the above option will open your computer’s proxy settings. The process from this point may vary depending on your operating system (Windows, macOS, Linux), as proxy settings are typically managed at the system level.
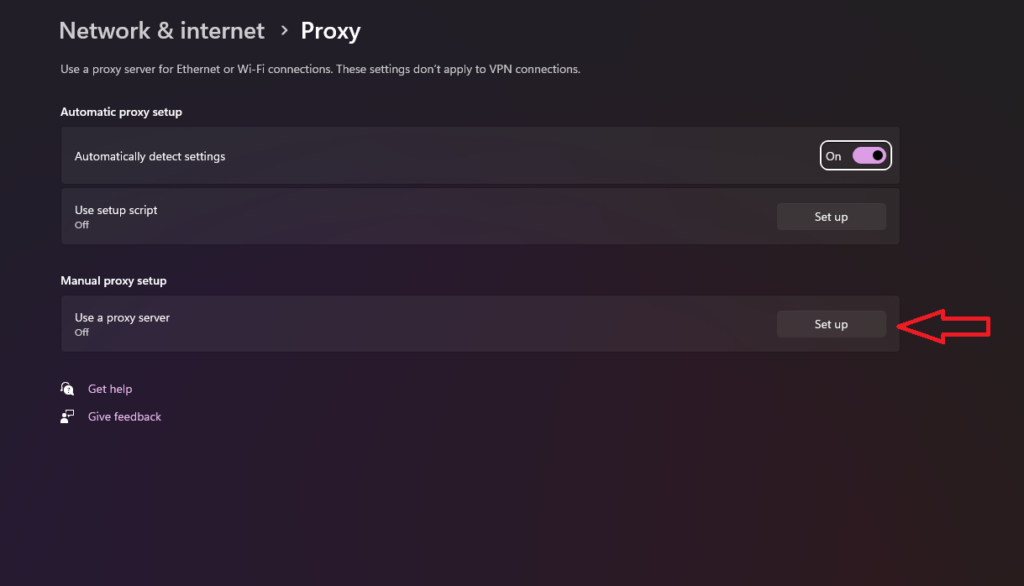
Configure Proxy Settings: Within your computer’s proxy settings, you can configure the proxy settings according to your preferences. You may need to consult with your network administrator or service provider for the specific proxy settings you should use. Once configured, save the settings.
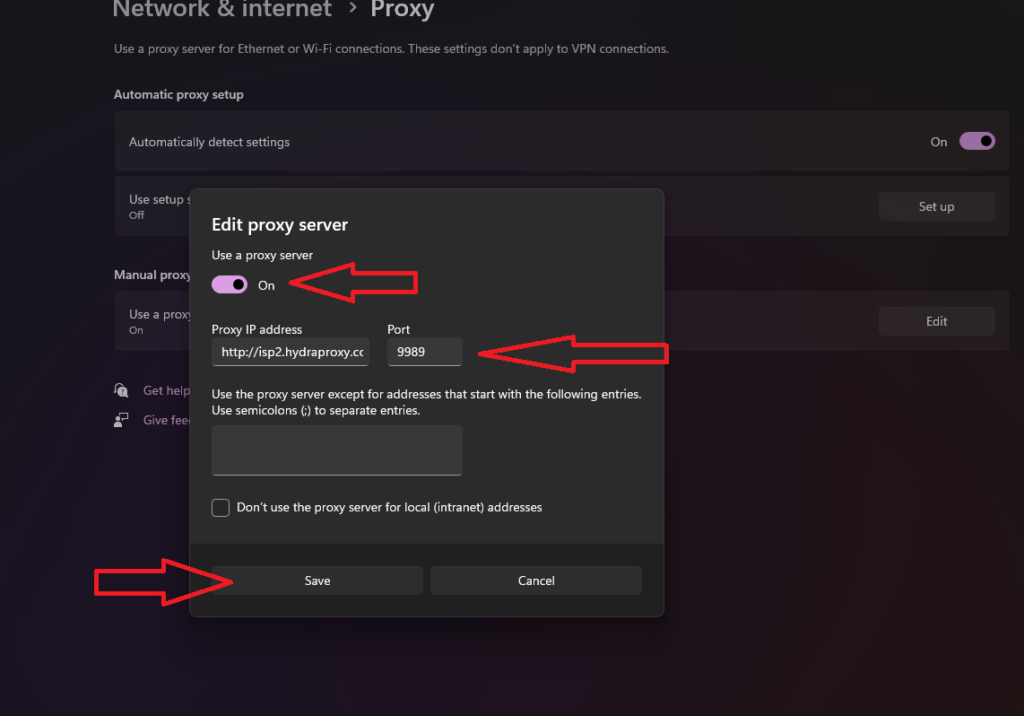
Return to Brave: After configuring the proxy settings on your computer, return to the settings menu by clicking on the Brave Browser tab or window. After that you have 2 options:
- In case of our mobile proxies you are good to go as they use a whitelisted IP as a form of authentication (please make sure that the whiteliste ip is set up correctly)
- In case of our rotating residential proxies you will need to copy and paste the username and password for the proxy. You can find them by clicking on the manage access button next to your order.
macOS (similar to Windows)
- Open System Settings
- Go to Network
- Select your active connection (Wi-Fi or Ethernet)
- Click Advanced
- Open the Proxies tab
- Choose the proxy type (HTTP, HTTPS, SOCKS)
- Enter your proxy host and port
- Save and close
Now Brave will honor these settings.
How to Set a Proxy in Brave Browser (Linux & Ubuntu)
On Linux — including Ubuntu — Brave also follows the system proxy settings. But because Linux distros vary, there are a few ways to configure this.
Using GUI (Ubuntu)
- Open Settings
- Select Network
- Click Network Proxy
- Choose Manual
- Enter:
- Proxy host
- Port
- Apply system-wide
Brave will now use this proxy configuration just like other apps.
Using Environment Variables (Command-Line)
If you prefer the terminal or need proxy settings for specific apps, you can use environment variables:
export http_proxy="http://proxy.example.com:8080"
export https_proxy="http://proxy.example.com:8080"
Replace proxy.example.com and 8080 with your proxy’s host and port.
To make the settings permanent, add those lines to:
~/.bashrc
or
~/.profile
Then reload:
source ~/.bashrc
Brave will use these variables when launched from that environment.
Testing Your Proxy in Brave
Once you’ve configured a proxy:
- Open Brave
- Go to a site that shows your IP (for example, whatismyip.com)
- Check whether the displayed IP matches your proxy
If it does, that means Brave is successfully sending traffic through the proxy.
Common Issues and Troubleshooting
Brave Isn’t Using the Proxy?
- Confirm the proxy settings are set at the system level
- Restart Brave after changing proxy settings
- If using environment variables on Ubuntu, make sure you launch Brave from a terminal that loads them
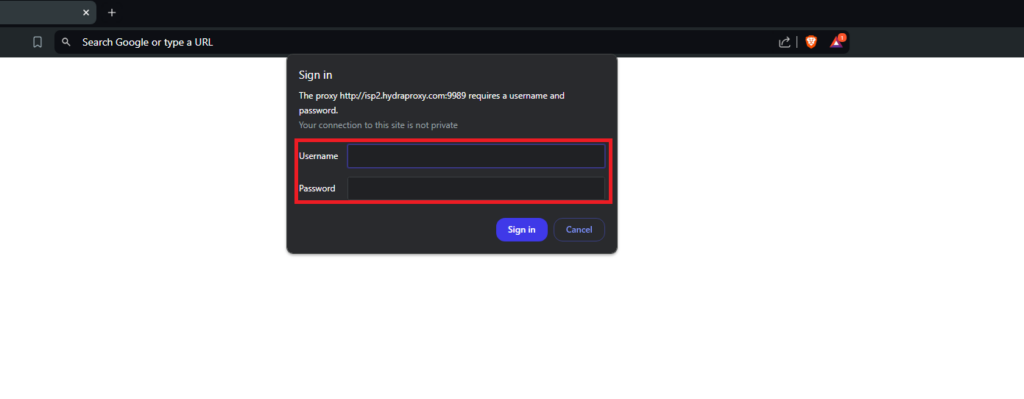
Proxy Requires Authentication
If your proxy requires a username/password, Brave will usually prompt you the first time. Make sure you enter the correct credentials.
Should You Use a Proxy in Brave?
Proxies can help with:
- Improving privacy
- Bypassing regional restrictions
- Testing how your site appears from another location
But they don’t encrypt traffic like a VPN does. If privacy and encryption are your primary goals, a VPN might be a better choice.
Quick Summary
- Brave uses your system’s proxy settings
- On Windows and macOS, set the proxy via system preferences
- On Ubuntu, either use the system GUI or set proxy variables in your shell
- Verify your setup with an IP lookup site
Setting up a proxy in Brave doesn’t have to be confusing — once you understand that Brave defers to your system, it becomes a simple matter of configuring your operating system just once.
That’s it! You’ve successfully set up a proxy in Brave Browser. Remember that if you ever want to disable the proxy or change its settings, you can do so by accessing your computer’s proxy settings again and making the necessary adjustments.