XLogin Antidetect Browser is a multi-account anti-association browser. It simulates multiple real physical devices by creating multiple virtual profiles, modifying browser fingerprints, and allowing users to run unlimited accounts on a single device without being detected.
1) First you need to place an order
After you decide what type of proxy you need out of Mobile, Residential or ISP proxies proceed to place an ordr. You can find a detailed article on placing an order with Hydraproxy here: https://hydraproxy.com/how-to-order/
2) Get your HydraProxy access details (Dashboard → “Manage access”)
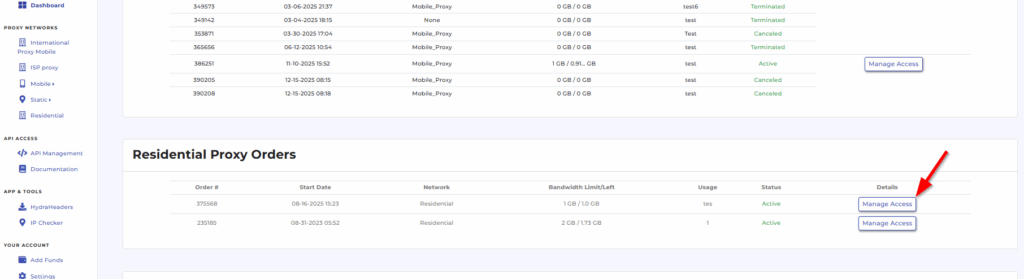
A) If you’re using HydraProxy Residential Proxies / International Mobile Proxies / ISP Proxies
Lets exemplify using HydraProxy’s residential proxy format is shown as:username:password@isp2.hydraproxy.com:9989
So you’ll have:
- Host:
isp2.hydraproxy.com - Port:
9989 - Username / Password: from your HydraProxy dashboard credentials
(They also note you can use a numeric “server IP” instead of the hostname via dashboard → manage access.)
Important: Residential supports HTTP/HTTPS only (no SOCKS) while International Mobile Proxies and ISP Proxies have both HTTP/s and SOCKS protocols available.
B) If you’re using HydraProxy USA Mobile or Static Mobile Proxies
HydraProxy states mobile proxies do not use username/password auth; instead they use IP whitelisting (your public IP must be added in HydraProxy “Manage access”).
Also, mobile supports HTTPS and SOCKS5.
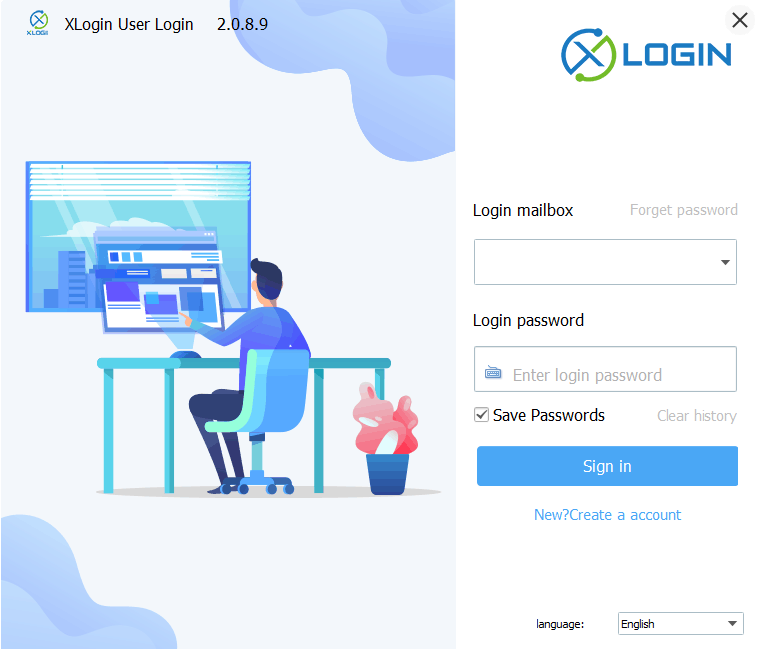
3) Download and install XLogin, then create an XLogin account (New users enjoy 3-day free trial).
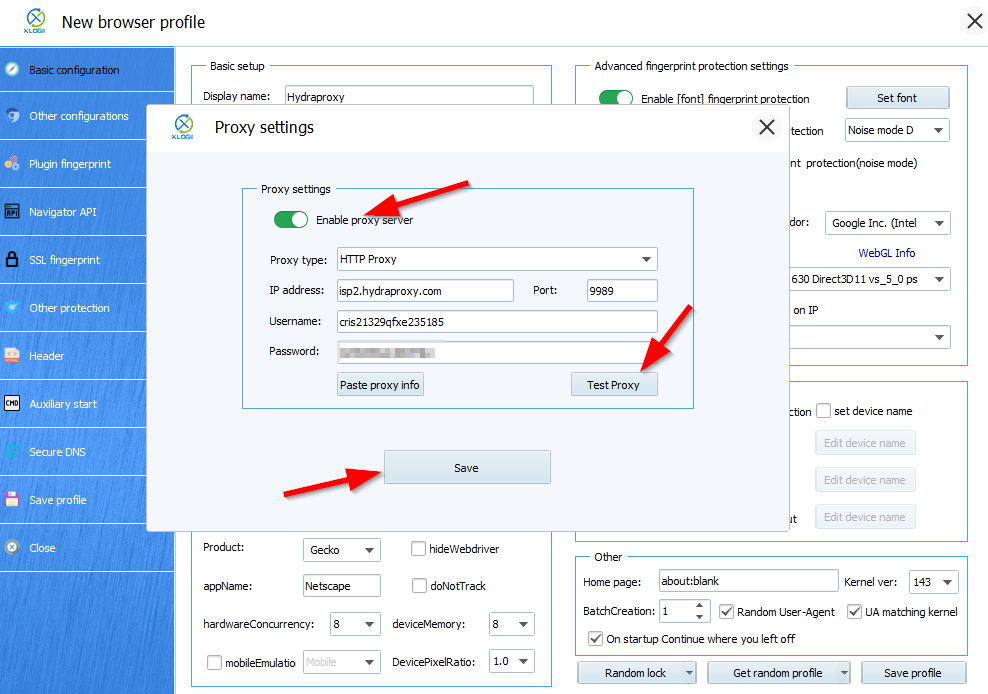
4) Add HydraProxy into XLogin (per-profile proxy)
XLogin’s per-browser proxy flow is: New browser → Enable proxy server → fill Proxy type + IP:Port:Username:Password → Test Proxy → Save.
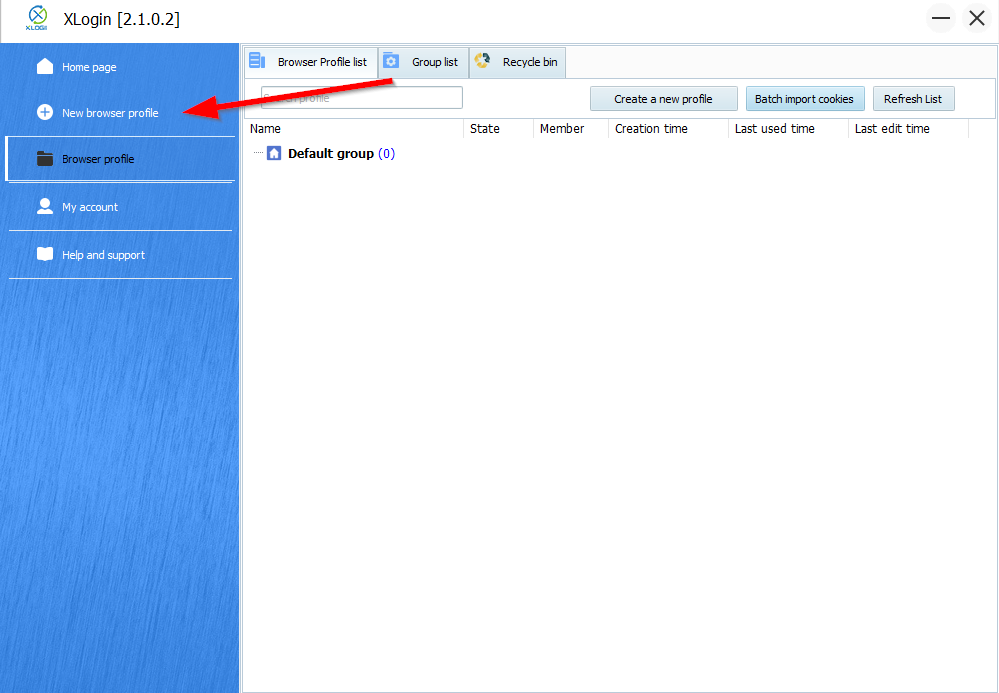
Step-by-step in XLogin
- XLogin client → New browser profile
- Find Settings proxy server
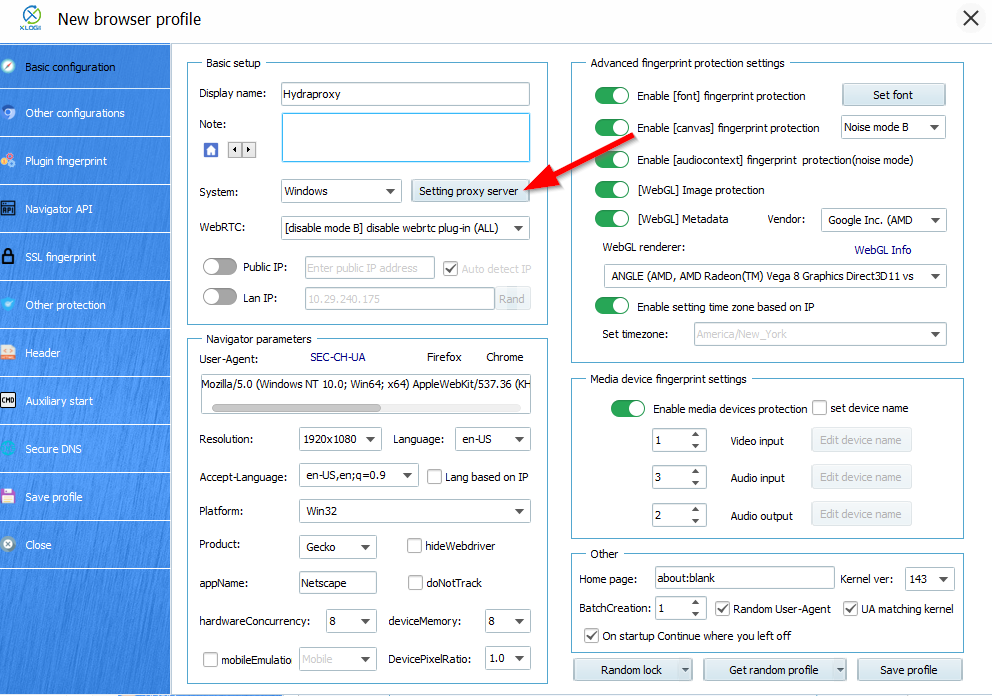
- Toggle Enable proxy server
- Choose Proxy type
- Fill the fields:
- IP/Host
- Port
- Username (if used)
- Password (if used)
- Click Test Proxy
- If successful → Save
5) What to enter (copy/paste examples)
A) HydraProxy Residential in XLogin
- Proxy type: HTTP or HTTPS (either is fine; pick what you prefer)
- IP/Host:
isp2.hydraproxy.com - Port:
9989 - Username:
<your_res_username> - Password:
<your_res_password>
This matches HydraProxy’s documented residential endpoint format.
B) HydraProxy Mobile in XLogin (whitelist auth)
- Proxy type: HTTPS or SOCKS5 (depending what your order supports)
- IP/Host: shown in HydraProxy dashboard for that mobile order
- Port: shown in dashboard (for international mobile they mention 8000/8001 depending on protocol)
- Username / Password: leave blank
- In HydraProxy dashboard → Manage access:
- Add your public IP to the Whitelist IP field
6) Common fixes if “Test Proxy” fails
- Wrong proxy type: Residential is HTTP/HTTPS only (no SOCKS).
- Mobile whitelist not set: Add/update your current public IP in HydraProxy → Manage access → Whitelist IP.
- Host vs IP mismatch: If DNS/hostname has issues, HydraProxy notes you can use the numeric server IP from the dashboard (for residential).
- Protocol/port mismatch (international mobile): If you switch SOCKS5 vs HTTPS, ensure you’re using the right port (they explicitly warn about this).